Synopsis:
The purpose for adminpak.msi is made so that you can access your server without the hassle of going into the server room to configure settings as most businesses have their server rooms both locked and cooled so the server(s) doesn't overheat. The goal for this project is to install adminpak.msi and create a user to add to the server.
Steps:
1.
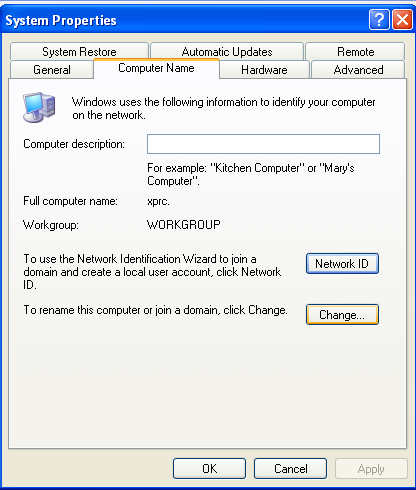
After installing both a Windows XP unit and a Windows Server 2003 unit, ensure you have the DNS address at hand from the Windows Server 2003 unit as well as the administrator password as the first step will involves establishing the XP unit to be apart of the domain name (note, be sure to promote the server via “DCPROMO” using “run” before doing this!). For this demonstration, I will be using “rcordner.local” for the domain name. Go into control panel on your XP unit and double click on the “system” icon and click on “change” and you will be brought up to a screen which will ask you what workgroup or domain you are apart of (note, ensure that your server's “preferred DNS server” matches the IP address of the server's). Type in the domain name and click “OK.” Then, you will be prompted for the server administrator and the password. Type them in and then you will now be apart of the server. You must reset for the changes to work!
2.
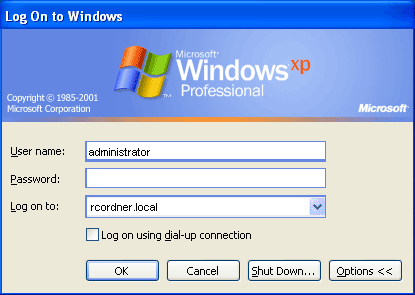
Once the XP unit has started up, make sure that you log in as the system administrator for the server. To change the server, click on “options” then select the domain name (in this case, it's rcordner.local). Login and you'll have successfully logged on to the server!
3.
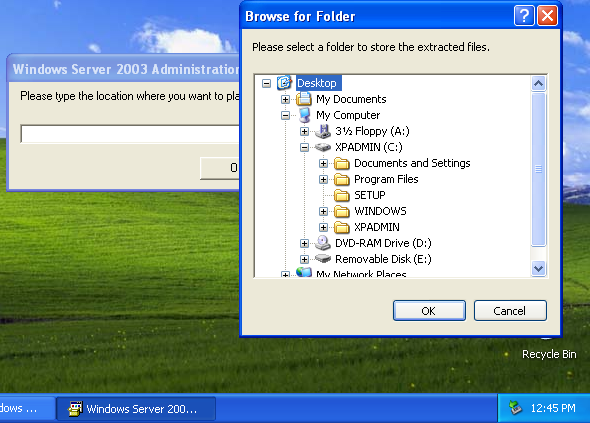
Head on over to the following URL on to Microsoft's website. From there, click on “download” to download adminpak.msi. Then, run the install. You will be asked for where you want to place the extracted files for admin pack. For easy access, it's recommended to put it on the desktop where you'll find it easier.
Now, click on the computer icon that says “adminpak.” Agree to the End User License Agreement and continue on with the install.
4.
Click “start” and you will now see an “Administrative Tools” on there much like you'd see it on a Windows Server 2003's start button.
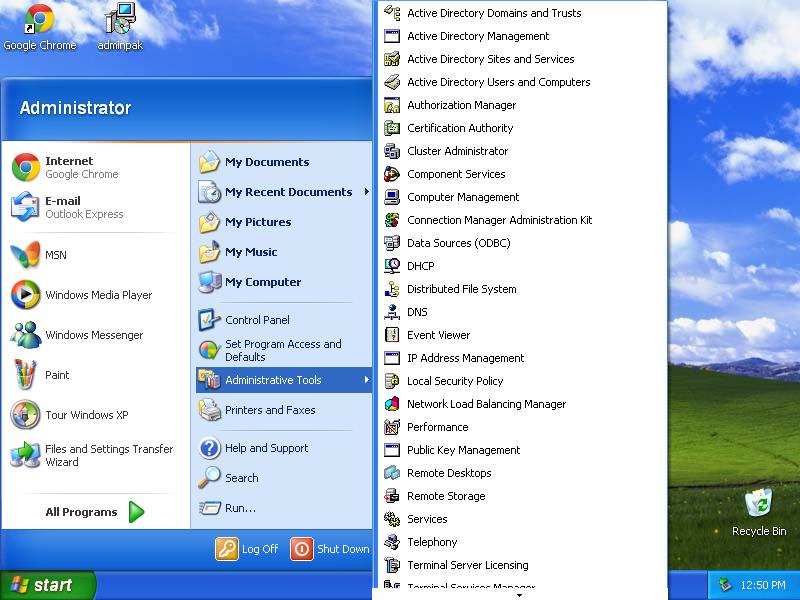
5.
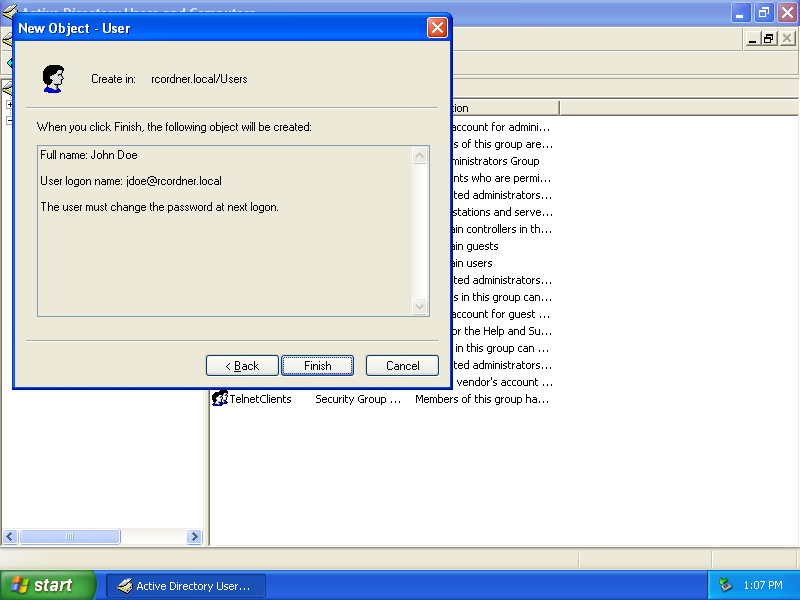
Now it's time to create a user! With that new “Administrative Tools” button, click on “Active Directory Users and Computers” (should be towards the top).

Look familiar?
6.
Now, create a user by clicking on the icon that shows a person's head that has the bubble appear that says “create a new user in the current container.” Now, you can create a user just like you would if you were using Windows Server 2003.